

Who hasn’t dreamed of having hair as soft and shiny as it looks in those dreamy shampoo commercials? But let’s be real, a lot of us are dealing with dryness, frizz, or just a general lack of luster. Have you ever found yourself staring at those expensive salon hair products and wondered, “Isn’t there a way to get similar results without burning a hole in my wallet?” Guess what? There is. Enter the hot oil treatment—simple, effective, and totally doable at home.
You might be asking, “What exactly is a hot oil treatment?” It’s a nourishing, warm mix of natural oils you apply to your hair and scalp to moisturize and soften. It’s an old-school remedy, an antidote for the modern hair drama.
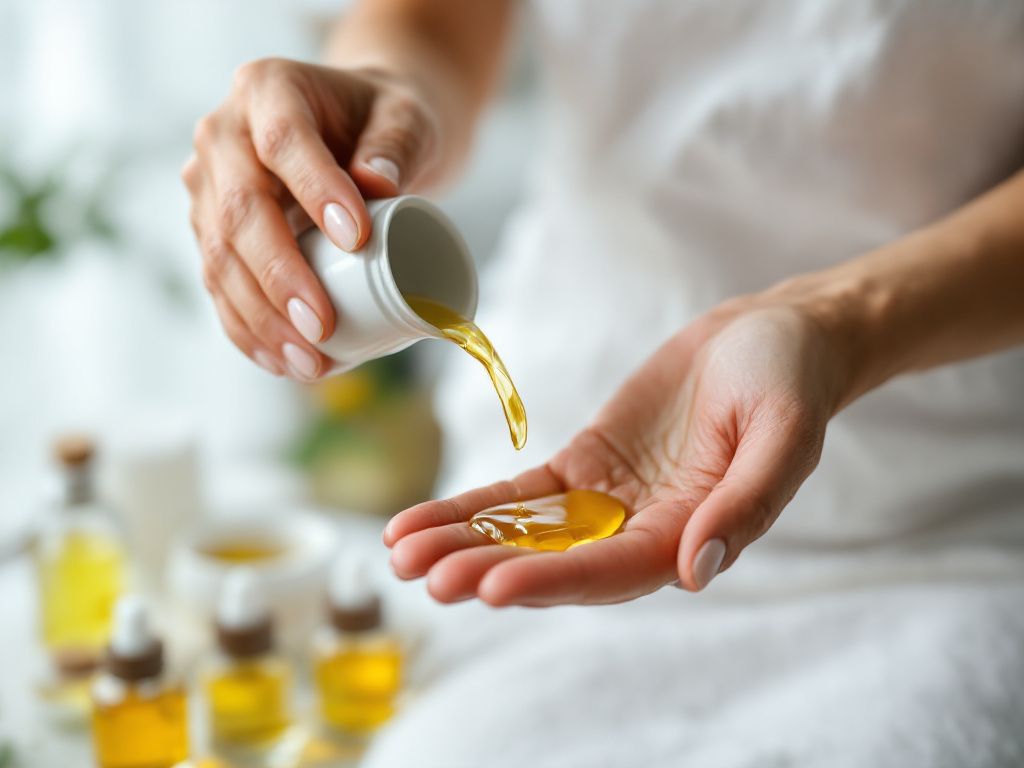
Why Hot Oil Treatments Are a Game Changer
The beauty of hot oil treatments is they work like magic on dull, dry hair. And it’s not just about appearances. Here’s the scoop:
- Moisturizes and Strengthens: The oils penetrate deep, hydrating each strand from the inside out.
- Reduces Frizz: It’s like your hair took a chill pill.
- Improves Scalp Health: No one talks about the scalp, but keeping it healthy leads to better hair growth.
- Natural and Cost-Effective: You probably have most of what you’ll need in your pantry!
Let’s spill the tea on how you can prep this at home.
Choosing Your Oil: What’s in Your Pantry?
Before we dive in, let’s talk oils. Different oils bring different benefits. Here’s a quick lowdown:
- Coconut Oil: Known for deep conditioning and reducing protein loss.
- Olive Oil: Great for strengthening plus adds super shine. (Hello Italian kitchens!)
- Argan Oil: The desert miracle known for tackling dryness.
- Jojoba Oil: Balances natural oil production and reduces dandruff.
- 5. **Sweet Almond Oil: Packed with Vitamin E for protection from sun damage.
Feel free to blend them up. Customize to meet your hair’s unique needs, just like a personal hair mixologist. Sound intriguing?

How to Prepare a Hot Oil Treatment
Step 1: Gathering Your Ingredients
You’ll need:
- Oil(s) of choice: About 2-3 tablespoons depending on your hair length and thickness.
- Small pot or microwave-safe bowl: This is where the magic happens.
- Application brush/towel: To apply the blend and catch spills.
- Shower cap: To help lock in warmth and allow for better penetration.
Step 2: Heating the Oil
Here’s the trick: We want the oil warm, not boiling. Gently heating boosts absorption but too hot can damage your scalp.
- Stovetop: Pour the oil into a small pot. Warm it over low heat for 1-2 minutes. Keep checking it with your finger; you’re not making soup.
- Microwave: Pop it in a bowl and warm for about 10-15 seconds. Do a quick temperature touch-test before applying.
Step 3: Application

Divide and conquer.
- Divide your hair into sections: This makes it easy to work through and ensures even coverage.
- Start at the scalp, massaging the oil in with your fingertips.
- Work your way down to the ends, coating every strand.
Pro-tip: Be mindful of the middle, don’t overload the top or just the ends. Balance is key.
Step 4: Lock in With Heat
Slip into that shower cap and maybe wrap it up with a warm towel—the moisture stays snug inside. Give it about 15-30 minutes to work its magic. Now is the perfect window for a face mask or that podcast you’ve been meaning to listen to.
Rinsing and Reveling in Results
All good things must come to a rinse.
- Use lukewarm water initially, shifting to cold at the end to seal the hair cuticle.
- Shampoo thoroughly: You want to get out that extra oil residue. Depending on your hair thickness, you might need two rounds.
- Dry and admire: Let your hair air dry naturally to see the full, glorious effect.
Common Mistakes to Dodge
- Overdoing It: Too much oil can be counter-productive. Less is more initially. You can always add more on the second round.
- Skipping the Balance: Mix the right amount of oils. For finer hair, lighter oils (like Argan) work better to avoid weighing it down.
- Using Too-Hot Oil: Protect that lovely scalp! Always do a temperature check.
Hit Some FAQs on Hot Oil Treatments

**How often should I do this?**
Every hair type differs, but generally, once a week is ample. For excessively dry hair, pushing it to two times could help until your hair regenerates its sheen.
**Can I sleep with it overnight?**
Although it seems tempting, it might suffogate the scalp leading to immobilized follicle functions. Stick to 30 minutes to an hour, max.
**Do I always need to wash it out?**

Yes, because leaving oil in indefinitely can attract dirt and pollutants, leading to new problems.
The Joy of Personalizing Your Hair Routine
Go wild and customize. Try adding essential oils for a sensory uplift—lavender for relaxation, tea tree to paint antiseptic on scalp issues, or peppermint for a tingling refresh.
Consider this your mini at-home spa experience. It’s about more than just hair—it’s a ritual, a moment for self-care, a reason to play your favorite tunes and zen out. Ready for lush hair days without breaking the bank or stepping outside? Give hot oil treatments at home a whirl, and watch your silky strands envy sunlit glory.
Put aside an hour for yourself this week and whip up this nurturing potion. Trust me, the results can be downright transformative—and your reputation for dazzling locks might just precede you.
Frequently Asked Questions
How often should I wash my face mask to prevent maskne?
To prevent maskne, it is crucial to wash your face mask regularly. For fabric masks, wash them after every use, similar to how you would wash your underwear[2][3][4]. Disposable masks should be tossed after each use to prevent the buildup of bacteria and other contaminants[3][5>.
What type of skincare products are best for preventing maskne?
For preventing maskne, use skincare products that are oil-free or noncomedogenic. These products, such as gentle cleansers, moisturizers, and sunscreens, help prevent clogged pores and reduce the risk of acne. Look for products containing salicylic acid or benzoyl peroxide for their acne-fighting properties[1][3][4>.
How can I reduce friction and irritation caused by wearing a face mask?
To reduce friction and irritation, choose a mask that fits well and is made from breathable fabrics like cotton or bamboo. Loosen the mask straps, use pads under the straps, or consider a headband-style mask to minimize friction. Taking brief breaks to remove the mask and allow your skin to breathe can also help[2][3][5>.
What are some additional tips to prevent maskne while wearing a face mask?
In addition to regular mask washing and using the right skincare products, avoid touching your face, skip makeup or use noncomedogenic makeup, and moisturize your skin to keep it hydrated. Also, limit the use of active ingredients like retinol or benzoyl peroxide during the day when wearing a mask, and consider using a topical antimicrobial cream to prevent bacterial buildup[1][3][4>.
References
Leave a Reply